

How to Clean and Maintain a Display Case Without Damaging Your Cards
To clean and maintain a display case without damaging your cards, use a clean microfiber cloth, avoid ammonia or alcohol on acrylic, dust before wiping, and never spray cleaners near collectibles. Acrylic and glass require different care, and cards themselves should almost never be “cleaned” beyond a gentle microfiber wipe.
If you’re displaying cards instead of locking them in a box (respect), keeping the case clean matters almost as much as protecting the cards themselves. The problem is that most display damage doesn’t come from time or sunlight first, it comes from well-intentioned cleaning with the wrong cloth, the wrong spray, or way too much confidence.
Collectors learn this the hard way: acrylic hazes, micro-scratches appear out of nowhere, dust somehow gets worse after cleaning, and suddenly you’re afraid to touch the case at all. The good news is that keeping a display case clean and card-safe is actually boringly simple once you know the rules, and you only need to do it occasionally.
In this guide, I’ll walk through how to clean and maintain a display case the same way museums and long-term collectors do it: minimal products, minimal contact, and zero risk to the cards inside. We’ll cover acrylic vs glass, what to clean with (and what to never use), how to deal with scratches, and whether you should ever touch the cards themselves.
If you’re serious about displaying your collection and enjoying it daily, this is the stuff that keeps everything looking mint without turning maintenance into a hobby of its own.
The golden rules (the stuff that prevents 90% of disasters)
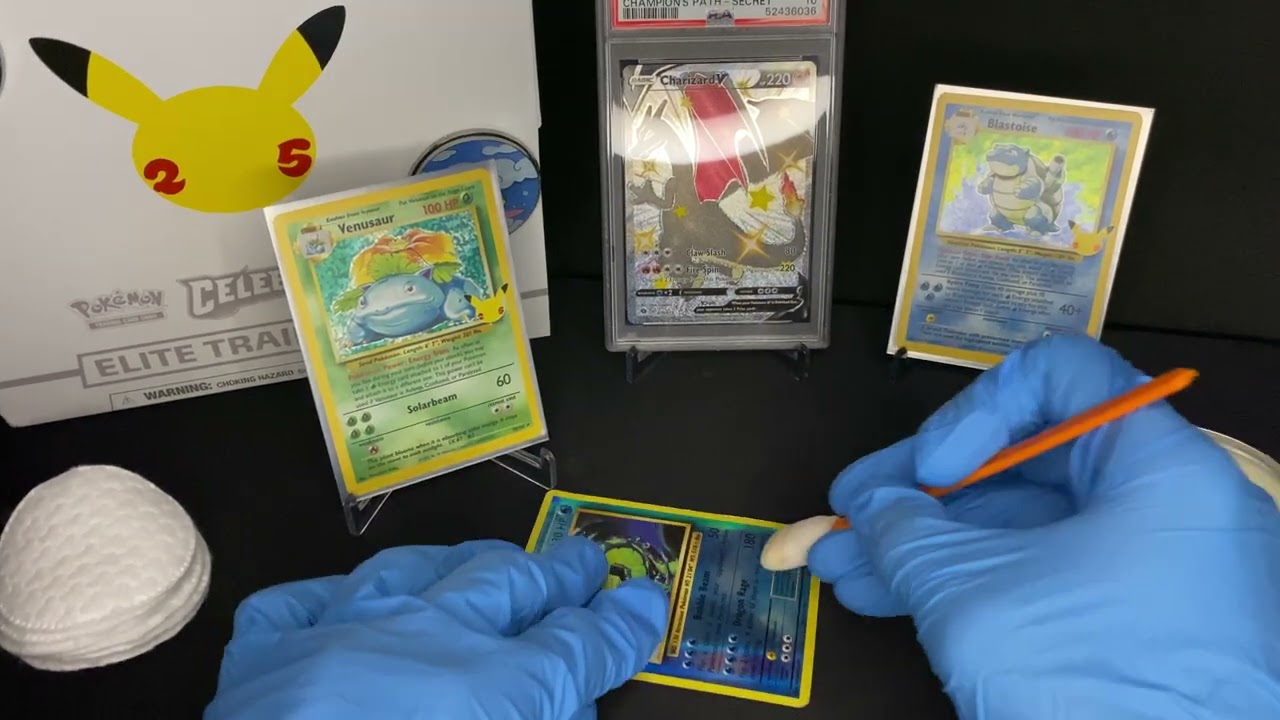
Most display case damage doesn’t come from age, UV, or dust buildup. It comes from cleaning too aggressively or with the wrong mindset. If you follow these rules, you’ll avoid almost every horror story collectors complain about.
At a high level, the goal is simple: touch the case as little as possible, and when you do, make sure nothing abrasive or chemical is involved. Acrylic especially doesn’t forgive mistakes, and once haze or micro-scratches show up, you can’t unsee them.
Here are the rules that actually matter:
-
Dust always comes first.
Wiping a dusty surface is how micro-scratches happen. Loose particles act like sandpaper once pressure is applied. -
Microfiber only, and it must be clean.
A “mostly clean” cloth is not clean. A cloth that touched a kitchen counter or TV screen last week is a liability. -
Never use ammonia, alcohol, or household glass cleaners on acrylic.
Even “eco,” “natural,” or “streak-free” formulas can cause hazing or long-term degradation. -
Spray the cloth, not the case. Always.
Overspray is how cleaner ends up on slabs, sleeves, cards, wood bases, or inside seams. -
Light pressure beats enthusiasm.
If something doesn’t come off easily, forcing it usually makes it worse. Re-dust, switch cloths, or reassess. -
Test anything new on a hidden area first.
Back panel, bottom edge, or interior lip. Never experiment on the main viewing window.
These rules apply whether you’re dealing with a high-end acrylic case, a glass cabinet, or a mixed build with metal or wood components. The specifics change by material, but the philosophy stays the same.
If you’re not sure what material your case is made of (and a surprising number of collectors aren’t), that’s the next thing to clear up—because acrylic and glass behave very differently once cleaning starts.
Identify your case materials in 20 seconds (acrylic vs glass vs mixed cases)
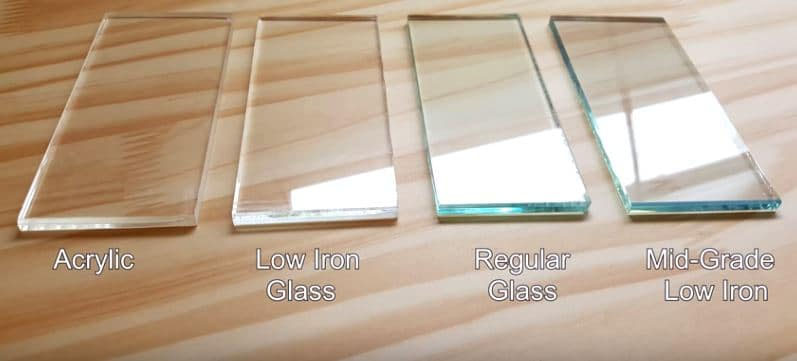
Before you clean anything, you need to know what you’re actually touching. Acrylic and glass look similar from a distance, but they react very differently to cleaners, pressure, and even temperature. Most accidental damage happens when someone treats acrylic like glass.
If you’re not sure what your display case is made of, here are a few quick ways to tell.
First, the tap test. Gently tap the panel with a coin or your fingernail. Acrylic makes a dull, muted click. Glass makes a sharper, higher-pitched sound. You’re not trying to knock on it, just enough contact to hear the difference.
Second, the touch test. Place your palm flat against the surface. Acrylic will feel closer to room temperature almost immediately. Glass usually feels noticeably colder.
Third, weight and flex. Acrylic panels are lighter and have a tiny bit of give. Glass feels rigid and heavy, especially on larger panels. You’ll notice this most when opening doors or lifting a lid.
Many modern display cases are mixed builds, which is where people get into trouble. It’s common to see acrylic viewing panels paired with metal frames, wood bases, or glass shelves. That means one cleaner can be safe for part of the case and risky for another, so your approach has to be controlled.
Once you know what material you’re dealing with, the rest becomes straightforward. Acrylic needs gentler handling and specialized cleaners, while glass is more forgiving but still easy to mess up around frames, seals, and interior components.
Your safe cleaning kit (what to buy once and reuse forever)

You don’t need a drawer full of products to maintain a display case. In fact, the more products you rotate through, the higher the odds you’ll eventually use the wrong one. Long-term collectors usually settle on a small, boring kit and never change it.
At minimum, this is what you want on hand.
-
Microfiber cloths (multiple, dedicated)
Buy more than one and label them mentally as “display only.” Once a cloth touches a kitchen counter, TV, or window, it’s retired from display duty. Microfiber picks up grit invisibly, and that grit is how acrylic gets scratched. -
Distilled water
Tap water leaves mineral spots, especially on acrylic and glass under lighting. Distilled water avoids that entirely and costs almost nothing. -
Mild dish soap (rarely used)
This is for fingerprints or grime that won’t lift with water alone. One tiny drop in distilled water is more than enough. -
Acrylic-safe cleaner or polish
This is optional but useful for acrylic cases. Products designed specifically for acrylic reduce static, improve clarity, and help slow dust buildup. These are also what you’d reach for if light haze starts to appear. -
Soft duster or compressed air (optional)
For quick dust removal without touching the surface at all. This is especially useful for vents, corners, and interior edges. -
Nitrile or cotton gloves (optional, high-value displays)
If you’re frequently rearranging high-end slabs or raw cards, gloves reduce fingerprints and oils inside the case.
That’s it. No paper towels. No “multi-surface” sprays. No experiments.
Once you’ve got this kit, maintenance becomes predictable and low-stress, which is exactly what you want when you’re cleaning something that holds cards you actually care about.
Routine maintenance schedule (so you’re not deep-cleaning like a maniac)
:max_bytes(150000):strip_icc()/homemade-glass-cleaner-1387930-04-1aefb507697841b4acc2b61bfb36682a.jpg)
One of the biggest mistakes collectors make is cleaning too often. Every time you touch a display case, you’re introducing friction, pressure, and risk. The goal isn’t a constantly polished case, it’s a consistently clean one with minimal contact.
Here’s a schedule that works in the real world.
For weekly or biweekly upkeep, all you’re doing is a light dust removal. A clean microfiber cloth or soft duster is enough. No sprays, no pressure. If it looks clean from normal viewing distance, you’re done.
For monthly maintenance, this is when you deal with fingerprints or smudges on the exterior. A lightly damp microfiber cloth with distilled water usually does the trick. Dry immediately with a second cloth to avoid streaks.
For quarterly or occasional deep cleaning, this only applies if the case actually needs it. Interior panels, corners, or areas near vents can slowly collect dust. If you’re cleaning inside, remove the cards first when possible, clean the surfaces, and let everything fully dry and air out before putting anything back.
What you want to avoid is “panic cleaning,” where you notice one smudge and suddenly you’re wiping the entire case, inside and out, with the same cloth. That’s how micro-scratches and haze start showing up over time.
If your case seems to get dusty faster than expected, that’s usually an environment issue, not a cleaning issue. Placement in the room, airflow, lighting, and static all play a role, and fixing those reduces how often you ever need to clean.
How to clean acrylic (plexiglass) safely, step by step
Acrylic looks amazing in display cases, but it’s also where most people mess up. It scratches easier than glass, builds static, and absolutely hates the wrong chemicals. The upside is that if you clean it properly, it stays crystal clear for years.
Here’s the safest way to do it.
Start by removing loose dust. Use a clean, dry microfiber cloth, a soft duster, or compressed air. This step matters more than people think. If you skip it and wipe immediately, you’re just dragging dust across the surface.
If dusting alone isn’t enough, lightly dampen a microfiber cloth with distilled water. Wipe using long, gentle strokes. Don’t scrub, don’t press, and don’t go back and forth over the same spot unless you switch to a clean section of cloth.
For fingerprints or stubborn marks, add one tiny drop of mild dish soap to distilled water. That’s it. You don’t need suds. Wipe gently, then immediately dry with a second clean microfiber cloth.
If you want to reduce static and slow future dust buildup, you can finish with an acrylic-safe cleaner or polish. Apply it to the cloth, never directly to the case, and buff lightly. This step is optional but helpful, especially in dry rooms.
What not to do is just as important.
- Never use paper towels, shop towels, or household rags
- Never use ammonia-based glass cleaner, alcohol-heavy sprays, or vinegar
- Never use abrasive pads, even “soft” ones
- Never apply heavy pressure to “work out” a mark
If something doesn’t come off easily, stop. Re-dust, switch cloths, or reassess. Acrylic damage usually happens in that extra ten seconds when someone thinks “just a bit more pressure.”
Done correctly, acrylic cleaning should feel almost anticlimactic. That’s a good thing.
How to clean glass display cases safely
Glass is more forgiving than acrylic, but that doesn’t mean it’s bulletproof. The glass itself can handle stronger cleaners, but the frames, seals, shelves, and whatever is inside the case often can’t. Most issues with glass cases come from overspray and residue, not from the glass panel itself.
Start the same way you would with acrylic: dust first. A clean microfiber cloth will usually remove fingerprints and light dust without any liquid at all.
If you do need a cleaner, use a small amount and keep it controlled. Spray the cleaner onto the microfiber cloth, not the glass. Wipe the surface gently, then buff dry with a second clean cloth to avoid streaks. This also prevents cleaner from seeping into edges, joints, or interior seams.
Glass scratches far less easily than acrylic, but once it’s scratched, it’s basically permanent. There’s no easy polish fix. That’s why clean cloths still matter, even with glass.
A few things to watch out for:
- Be careful around wood bases, metal frames, and interior shelves
- Avoid letting cleaner drip down into seams or onto display items
- Don’t assume a cleaner safe for windows is safe for the entire case
If your case uses glass panels with acrylic shelves or an acrylic door, treat each surface separately. One cleaner for everything is how mixed-material cases get damaged.
Glass should end up streak-free and boring. If you’re buffing aggressively or chasing haze, something in your process is off.
Cleaning the inside without risking the cards
The inside of a display case is where mistakes get expensive. Overspray, trapped moisture, and residue don’t just affect the case, they affect the cards, slabs, sleeves, and labels inside it. If there’s one rule to remember here, it’s this: control everything.
Whenever possible, remove the cards before cleaning the interior. It adds a few minutes, but it eliminates almost all risk. Even UV-protected slabs and sealed cases don’t need to be exposed to cleaning vapors or drifting moisture.
If you can’t remove the cards, then cleaning becomes extremely limited. Dry dusting only, with a clean microfiber cloth or a soft duster, and zero liquids. No exceptions.
When you do clean the interior surfaces, spray any solution onto the cloth outside the case, not inside it. Wipe gently, then let the case sit open for a few minutes so everything fully dries and off-gasses before putting cards back in. This prevents moisture from getting trapped, which can lead to fogging, smells, or long-term material degradation.
A few practical rules collectors swear by:
- Never spray cleaner inside an enclosed case
- Never clean “around” cards with liquid products
- Let cases fully dry before closing them back up
- Keep liquids far away from slab labels and raw cards
Interior cleaning should be rare. If you find yourself needing to do it often, the issue is usually dust ingress or airflow in the room, not your cleaning habits.
Done right, the inside of a display case should stay untouched for months at a time.
Can (or should) you ever clean the cards themselves?

This is where collector opinions go completely off the rails, especially online. Short answer: for almost all cards, you should not “clean” them in the way people think of cleaning. No liquids, no sprays, no products, no hacks.
Cards aren’t dirty objects, they’re delicate printed surfaces. Anything strong enough to visibly “improve” a card is usually strong enough to alter it, and once that happens, graders can often tell. At that point, you didn’t clean the card, you changed it.
For most situations, this is the safe, accepted approach:
If a card or slab has light dust or fingerprints, a clean microfiber cloth is all you should use. Gentle pressure, one or two passes, done. No circular scrubbing, no repeated buffing.
Some collectors will use hot breath to lightly fog the surface before a microfiber wipe. That’s about as far as most professionals would ever go, and even then, only on slabs or modern cards where the risk is understood. If that doesn’t remove the issue, that’s usually your sign to stop.
What you want to avoid completely:
- Liquids, sprays, waxes, or “card care” products
- Alcohol, water, saliva (yes, people suggest this), or household cleaners
- Anything marketed as “restoring shine”
- Any process that makes you say “this looks way better now”
If a microfiber cloth doesn’t fix it, the card probably shouldn’t be sent for grading anyway. That’s a hard truth, but it saves a lot of regret.
For graded cards, remember that slabs already provide physical protection and some level of UV filtering. Your job is to keep the slab clean, not to intervene with the card inside.
Displaying cards is about enjoyment with controlled risk, not chasing perfection with tools that can permanently lower value. When in doubt, leave the card alone and focus on keeping the display environment clean instead.
Removing light scratches from acrylic (and knowing when to stop)
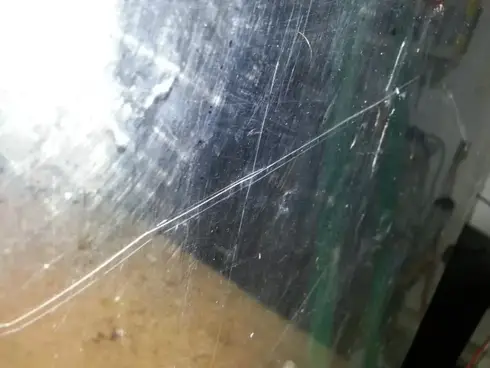
Scratches on acrylic are stressful because they show up under lighting and your eye goes straight to them. The good news is that very light scratches can often be improved or removed. The bad news is that going too far turns a small cosmetic issue into a permanently cloudy panel.
The first step is honest assessment. Run a clean fingernail lightly across the scratch.
- If your nail doesn’t catch, it’s usually a light surface scratch and fixable.
- If your nail catches, you’re in deeper territory and should slow way down.
For light surface scratches, an acrylic-specific scratch removal or polishing system is the safest route. These systems work in stages, starting slightly abrasive and finishing smooth, gradually leveling the surface rather than grinding it down all at once. Use a clean microfiber cloth, very light pressure, and work in short sessions. Check your progress often under normal lighting, not just a phone flashlight.
If the scratch improves but doesn’t completely disappear, that’s often the correct stopping point. Chasing “perfect” is how haze and distortion happen.
For deeper scratches, this is where collector discipline matters. Aggressive polishing, sanding, or DIY tricks can introduce:
- uneven clarity
- visible distortion under LEDs
- stress marks or fine cracks over time
At that point, museums and serious collectors usually make a simple decision: live with it or replace the panel. Acrylic is modular for a reason, and replacement is often cheaper than undoing a botched repair.
One important perspective shift helps here. A tiny scratch that’s invisible from normal viewing distance is not a failure. It’s part of owning and enjoying a display over time. Most people only notice these things because they’re actively looking for them.
Preventing scratches through careful cleaning and handling is far more effective than fixing them after the fact.
Environment: light, UV, humidity, and dust (the silent killers)

You can clean a display case perfectly and still slowly damage what’s inside if the environment is wrong. Cleaning handles what you can see. Environment handles what you can’t.
The biggest factor is light, especially UV. Direct sunlight is the obvious enemy, but strong indirect sunlight over long periods can also fade inks and labels. Even artificial lighting contributes a tiny amount over time. The fix isn’t panic, it’s placement.
Keep display cases out of direct sun paths. If sunlight hits the wall at certain times of day, that’s not the wall for your best cards. Simple blinds or UV window film can drastically reduce exposure without turning the room into a cave.
Humidity matters more than most collectors realize. High humidity can lead to fogging inside cases, adhesive breakdown on labels, and long-term material issues. Extremely dry environments increase static, which pulls dust onto acrylic like a magnet. Stable, boring conditions are ideal.
Dust is usually an airflow problem. Cases placed near vents, doors, or high-traffic areas will get dirty faster no matter how often you clean. Moving the case a few feet or adjusting airflow can cut cleaning frequency in half.
A few collector-tested guidelines:
- Avoid direct sunlight and strong reflective light paths
- Keep cases away from HVAC vents and exterior doors
- Aim for stable room temperature and moderate humidity
- Consider rotating high-end cards periodically if you’re risk-averse
There’s always some risk in displaying collectibles. The goal isn’t zero exposure, it’s managed exposure that lets you actually enjoy your collection.
If your environment is dialed in, maintenance becomes infrequent and stress-free.
Quick troubleshooting: common problems and simple fixes
Most display case issues fall into the same few categories. If something looks “off,” it’s usually not mysterious, and it’s almost never a reason to panic.
If your acrylic looks cloudy or hazy, it’s usually residue from the wrong cleaner or from over-polishing. Stop cleaning immediately. Let the surface rest, then use a clean microfiber cloth with distilled water only. If haze persists, a light pass with an acrylic-safe polish can often restore clarity.
If your case is a dust magnet, that’s static at work. Dry air and frequent wiping make it worse. An acrylic-safe anti-static cleaner helps, but so does reducing how often you touch the surface. Fixing airflow and humidity in the room often solves the problem faster than more cleaning.
If you’re seeing streaks on glass, the cloth is usually the issue, not the cleaner. Switch to a clean microfiber and buff dry. Using less product almost always improves results.
If there’s a musty smell or fogging inside the case, moisture was trapped. Remove the cards, open the case, and let it air out completely. Don’t close it again until everything is fully dry. In humid rooms, this can happen even without visible liquid.
If you notice new scratches after cleaning, that’s a sign of contamination. Retire the cloth immediately and replace it. Microfiber is cheap. Acrylic panels are not.
Most importantly, resist the urge to “fix everything at once.” Small, controlled adjustments solve problems better than aggressive cleaning sessions.
Conclusion
Cleaning and maintaining a display case doesn’t need to feel risky or obsessive. When you understand the materials, use the right tools, and clean less often but more intentionally, your case stays clear and your cards stay safe. Most long-term damage doesn’t come from age or display, it comes from rushed cleaning and the wrong products.
The real win is setting things up so maintenance becomes boring. Light dusting, controlled cleaning, and a stable environment let you enjoy your collection without constantly worrying about it. A display case should protect your cards and make you want to look at them every day, not stress you out.
At QuirkShelv, we design our display cases with that exact mindset: UV-conscious materials, clean lines, and layouts meant for real collectors who actually display their cards instead of hiding them away. If you’re already putting time and money into your collection, the case that holds it should be built with the same level of care.
If you want to go deeper, check out our guides on choosing the right display case material, protecting cards from UV exposure, and setting up a display that looks great without increasing long-term risk. Display your collection, enjoy it, and keep it looking mint without turning maintenance into a second hobby.
